JavaScript Error

You currently have JavaScript disabled on your web browser.

This website uses JavaScript, and This web page needs JavaScript activated to work correctly.

Please active JavaScript on your web browser and then refresh this web page.


Hello World


Aw, the famous "Hello World" program. It is usually the first program that most people learn to write. It's short, it's sweet, it's straight forward, and it's simple to develop.

Writing a simple program like this just to have it say "Hello World" may seem silly to some people, but fear not, there is actually a very good reason for writing it : to test the development environment to ensure that it is properly setup and can debug, compile, and execute a custom made program with.


Let's jump right in and view the source code:


using System;
namespace HelloWorld
{
	public static class Program
	{
		[STAThread]
		static void Main(string[] args)
		{
			// print the words Hello World to the consol output
			Consol.WriteLine("Hello World!");
		}
	}
}


Code Breakdown

The using directive allows the program to use the object types which are defined in a referenced namespace, and to use them without requring the developer to have to specifiy the fully qualified namespace of an object type whenever they desire or need to use an object that is defined within that namespace.

For example, in this sample program because we have included the using System directive then we just need to type string[] args to define a string array variable named args. If we did not include the using System directive then we would have had to typed the fully qualified namespace into the instantiation such as System.string[] args.

In its basic form, the using directive imports (or includes) all of the object types from within a single namespace into the program so that the program can more easily access and use any of the object types that are defined within that namespace. Before you can use the using directive on a namespace, the namespace must either already be defined within the program someplace or a program wide reference to its dll must be added to the project or solution. In our case here in this sample program, the System namespace is already defined within an external dll which this programs project has automatically referenced to when the project was initially created.

In this sample program we are instructing the project to use the System namespace so that this program can access and consume all of the object types that are defined within it, such as string variable types, as well as text itself "Hello World!", as well as other common system wide level objects.

The namespace keyword is used here to declare a designated scope within this program named HelloWorld which contains a set of related objects and object types within this project. A namespace in general can be used to organize code elements and to create globally unique types within its scope.

Next we define our class object within our projects namepsace with public static class Program.

The name of our class is Program, and we specify that it is accessible to the public so that the operating system can see it to execute it once our program is compiled.

We also specify that our class uses the static modifier, to declare this class to be a static member, meaning that it belongs to the type itself rather than to a specific object. Without the static modifier then the operating system, or any other program that executes this program, would need to instantiate an instance of this program into an object variable before calling its functions, but since we are using the modifier here then the operating system (the operating system being the program that is consuming and executing this sample program) does not need to declare an object of this program type first and can simply call its functions directly.

Inside our class we define a function with static void Main(string[] args) and we specify that it uses a single thread apartment by adding the [STAThread] attribute immediately above our functions declaration.

We name our function Main because all C# programs require a main entry point function named Main, which is exactly what its name says it is, and that is the main entry point into our program. This is where the execution of our programs code begins.

Inside our main function we give the instruction of Consol.WriteLine("Hello World!"); to instruct the program to write a line of text to the consol output, and we specify what that string value of the text is Hello World!. The text is displayed in the consol output without the quotes because in this instance the quotes are used to define the start and stop locations of the characters within the string value.

The line // print the words Hello World to the consol output is nothing more than a comment. Comments are ignored by the compiler and they do not affect the execution of the code in any way.

Comments are simply notes inserted into the source code by programmers for programmers, and are mostly used in an effort to explain in plain english what a piece of code is suppose to do. This is most helpful when working in teams, when working with larger and more complex programs, and/or when simply revisiting your own code that you had previously began working on some time back. You can think of comments as a // Note To Self : bla bla bla or a // TODO : write this code that you can then re-read later and remind yourself as you are browsing through your code continuing coding, doing bug fixes, or whatever. The point is, comments are your friend. Use them.

To create a comment you simply either use the double slash // method and then anything typed on the right side of it is now a comment, or you can enclose the comment into a slash star enclosure method such as /* everything inside this slash star and star slash enclosure is a comment */


Walkthrough

Use the following steps to actually create and run this program:

  1. Download and install Microsoft Visual Studio if you have not already.

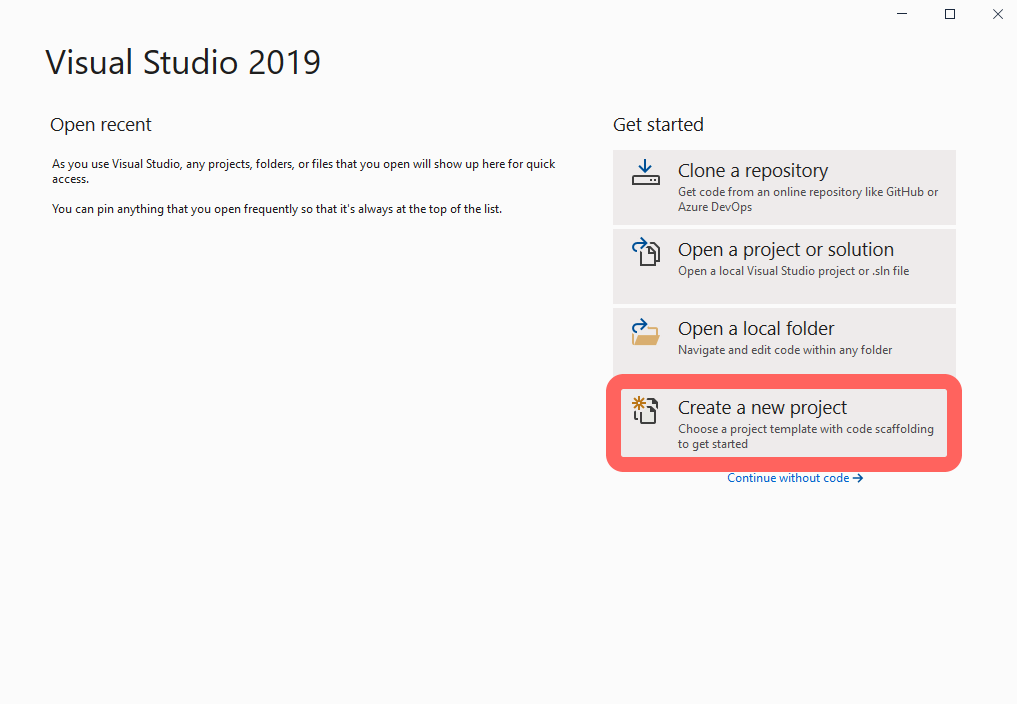
  2. Start Visual Studio and select Create a new project from the initial screen :
    Visual Studio 2019 startup screen

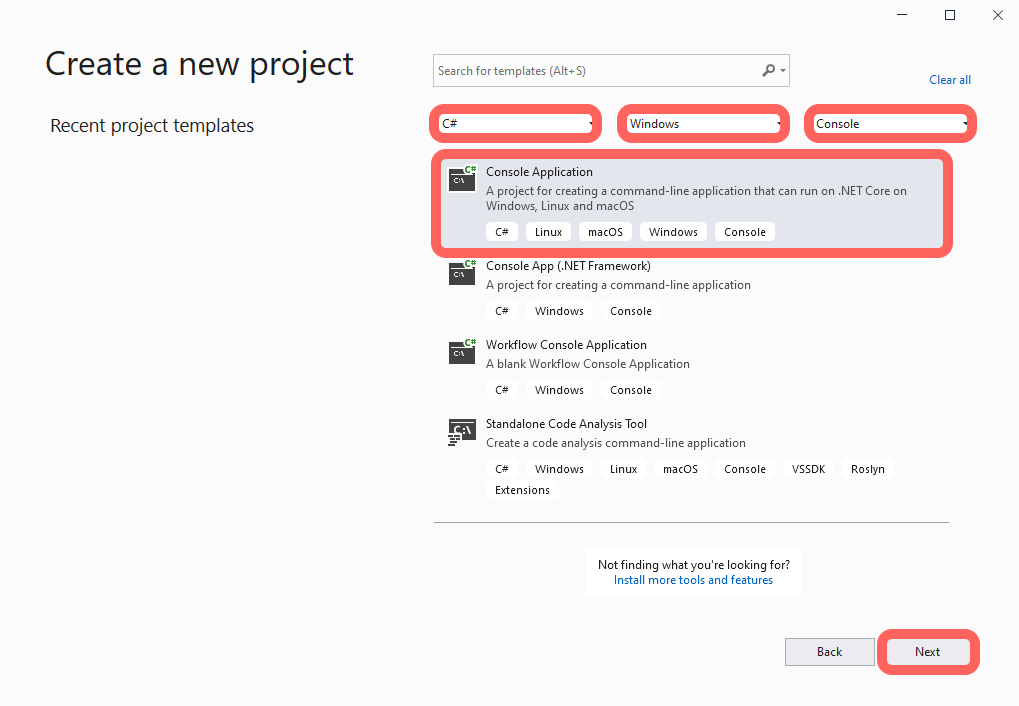
  3. Select C#, Windows, and Console from the drop down filters at the top right of the Create a new project screen, and then select the Console Application from the list of templates. Then click the Next button to continue:
    Visual Studio 2019 startup screen

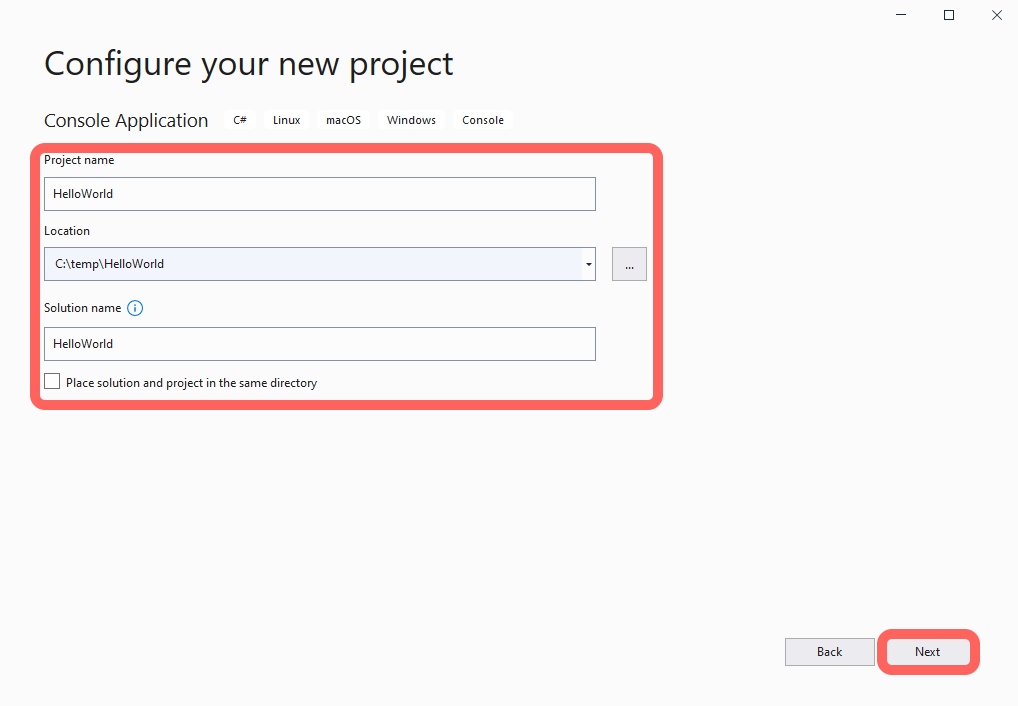
  4. Fill in the Configure your new project form by specifying the Project Name, Location of where to generate and save the program and code files, and Solution name. Then click the Next button to continue:
    Visual Studio 2019 startup screen

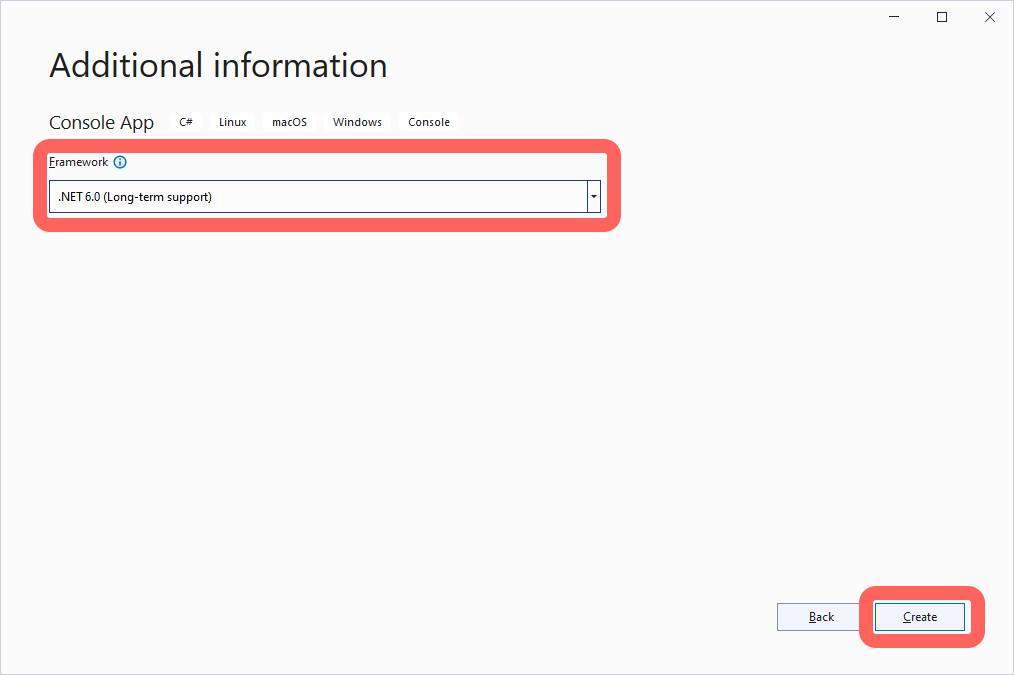
  5. Specify the desired .NET version from the Framework drop down list in the Additional information screen. Then click the Create button to continue:
    Visual Studio 2019 startup screen

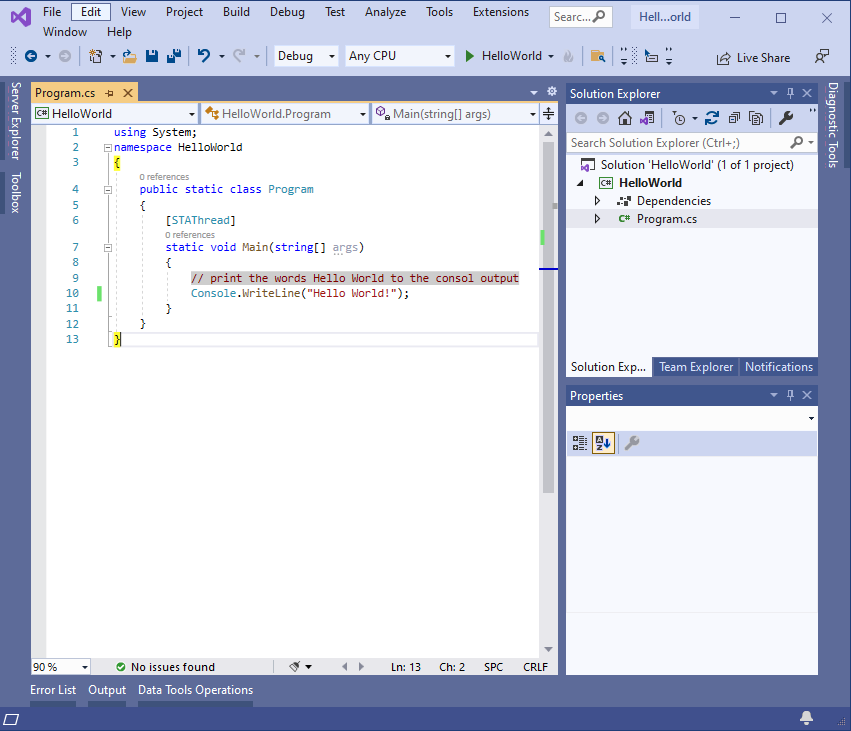
  6. Edit the default code with the code shown above :
    Visual Studio 2019 startup screen

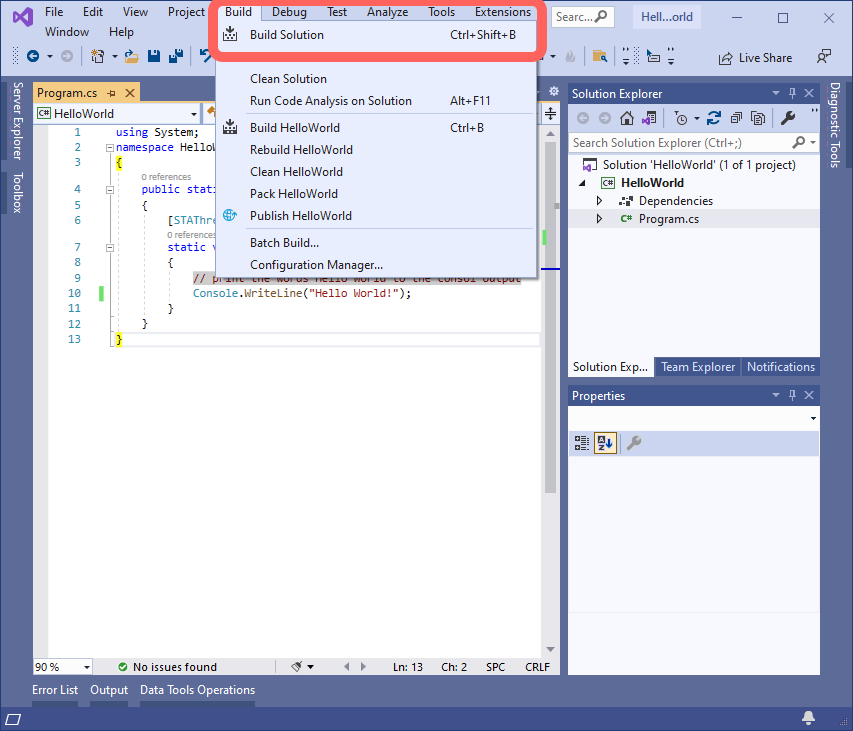
  7. Compile the code by pressing Ctrl+Shift+B or by clicking the menu button Build -> Build Solution :
    Visual Studio 2019 startup screen

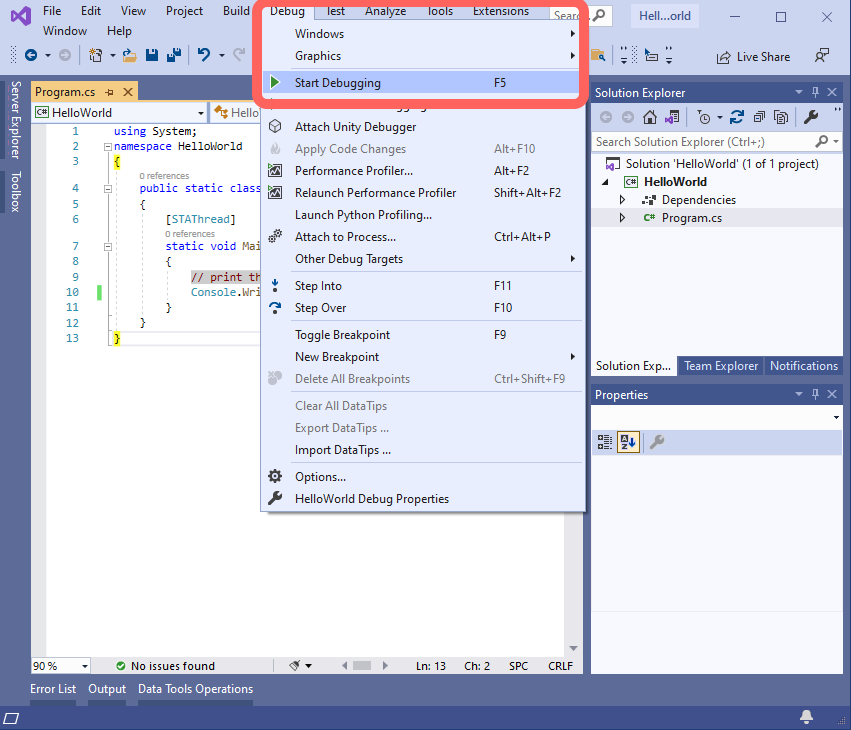
  8. Execute (run) the compiled code by pressing F5 or clicking the menu button Debug -> Start Debugging :
    Visual Studio 2019 startup screen

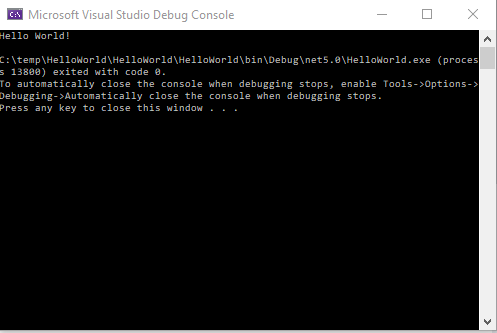
  9. View the programs results on the consol output window that should have popped up:
    Visual Studio 2019 startup screen

  10. Finish up by closing Visual Studio by selecing File -> Exit from the menu bar

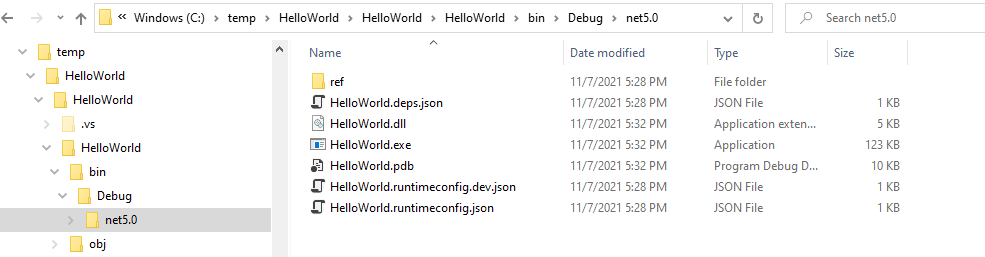
  11. Find and run your compiled exe code outside of Visual Studio by navigating to the folder you specified the program to be generated into and double clicking on the HelloWorld.exe file within its ../bin/Debug/net5.0/ folder:
    Visual Studio 2019 startup screen


Final Thoughts

Thank you for reading, I hope you found this blog post (tutorial) educational and helpful.


(0) pollYesResult
(0) pollNoResult


     About   |   Contact Us   |   Privacy   |   Terms & Conditions   |   © 2024 - T&J Divisions, LLC, All Rights Reserved